How I'm still not using GUIs: A guide to the terminal
TL;DR: Here are my dotfiles. Use them and have fun.
GUIs are bloatware. I've said it before. However, rather than just complaining about IDEs I'd like to provide an understandable guide to a much better alternative: the terminal.
IDE stands for Integrated Development Environment. This might be an accurate term, but when it comes to a real integrated development environment, the terminal is a lot better.
In this post, I'll walk you through everything you need to start making your terminal a complete development environment: how to edit text efficiently, configure its appearance, run and combine a myriad of programs, and dynamically create, resize and close tabs and windows.
La Raison D'Être
In an IDE you can only use plugins made specifically for it, in a terminal you can use any program. An IDE limits you to the extent of what their creators envisioned you would want to do. The terminal, on the other hand, allows you to combine many programs easily. Thanks to streams you can use a program's output as the input to another. They provide flexibility and enable creative use of diverse sets of tools for purposes their authors might have never imagined. That's one of the most remarkable characteristics of programs designed according to the UNIX philosophy.
Word, Excel, PowerPoint, and other Microsoft programs have intimate — one might say promiscuous — knowledge of each others' internals. In Unix, one tries to design programs to operate not specifically with each other, but with programs as yet unthought of. — Doug McIlroy
GUI's learning curves are less steep than the terminal's learning curve, but the more you get used to plain-text, the easier it becomes to type commands rather than to search for options or buttons. The hard part is to remember which commands to type.
IDEs also tend to do too much "magic". They hide essential details from the user for the sake of practicality, which makes it harder to determine the real cause of a problem. There are two main reasons for this. The first is that all this abstraction makes people utterly unaware of what the computer is doing. The second is that IDEs do an excessive number of operations in the click of a button, which makes it harder to break down the process and diagnose which part is defective.
Now you might argue that some IDEs have small windows with console interfaces that provide you with the same output as a terminal would, and that's true. However, it's not enough. If you are still unaware of how to communicate with the machine in front of you in its own terms, you won't be able to make any sense of what that IDE is showing. Being comfortable in a terminal means speaking the same language as the machine does.
Configuration for terminal programs is also extremely portable. To configure most programs all you need to do is copy a plain-text file to the correct directory. Doing this allows you to set up a complete development environment in a new machine in a matter of seconds or, at most, a few minutes.
Configuration files for terminal programs — generally called dotfiles — are much more amicable than configuration files for IDEs. Dotfiles are human readable and contain plain-text. They also become much less coupled with your projects than IDE configurations would be. When you use an IDE configuration file to describe how the computer should build your code you enforce everyone in your team to use the same tool. On the other hand, when you use make, for example, you give people the freedom to choose how they want to run make's targets, whether it be in a terminal or an IDE.
All the effort invested into becoming a skilled terminal user will soon pay-off. Since most of the time you are thinking rather than coding, saving a few key-strokes or milliseconds doesn't make that much difference. The real benefit of using the terminal is having a better comprehension of how your computer works and making your workflow more predictable and customizable.
Finally, being proficient with a terminal is a "learn-once-use-everywhere" — and "use-frequently" — skill. Not every machine has VSCode, Sublime or Atom installed, but every machine has a terminal.
The Terminal Starter Pack
These are the main programs I use to make my terminal a complete development environment:
At the end of this post you can find a list of other useful programs.
neovim
vim is my text-editor of choice and has a special place in my heart and my ankle.
neovim is another version of vim. It has all of vim's standard keybindings, the same features, and is fully compatible with vim configuration options.
To avoid the annoying seconds in which vim would freeze during tasks like syntax-checks, neovim lets you run jobs asynchronously.
It also supports scripts not only written in VimL — not my favourite language, let's put it like that — but also scripts written in LUA.
To make sure you are always using nvim rather than vim, you can alias the vim command to nvim by using the lines below. You can put them on your .zshrc, .bashrc, or whatever configuration file for the shell you are using.
alias vim="nvim"
alias vimdiff="nvim -d"
Learning vim
Even though many people fear vim and "how to quit vim" is one of the most popular questions on StackOverflow, vim is better mainly because it is different.
For learning to use vim effectively I'd highly recommend starting with vimtutor. It will seem boring in the beginning, but it is the most effective way of learning vim properly.
Resist the urge to quit. If you don't know how to accomplish a particular task, duck-duck-go it. In the first few days or weeks, you will have to remember which keys and commands do which things actively, but as time goes they will become deeply ingrained into your brain and editing text will be just like muscle memory.
Disable arrow keys from the start by adding these lines into your ~/.config/nvim/init.vim file (previously ~/.vimrc):
" don't use arrowkeys
noremap <Up> <NOP>
noremap <Down> <NOP>
noremap <Left> <NOP>
noremap <Right> <NOP>

" really, just don't
inoremap <Up>    <NOP>
inoremap <Down>  <NOP>
inoremap <Left>  <NOP>
inoremap <Right> <NOP>
I usually advise already proficient vim users to not put anything they don't understand into their init.vim file. Searching for a commands' meaning will lead you to a better understanding of vim and will give you the knowledge necessary to configure your tools so that they match your editing style and workflow.
Now you can go ahead and duck-duck-go the noremap and inoremap commands above if you're feeling adventurous.
Once you have gotten comfortable editing text, start noticing anti-patterns such as repeating the same key more than twice, repeating commands, or entering the insert mode to delete text.
You should always be asking yourself if there is a better way of doing something. Most of the time the answer will be "yes".
Avoid plugins unless you definitely need them. Most of the time, vim already has the feature you are looking for and it's better to not depend on any third-parties in this case. Using few plugins keeps your environment fast, free of bloat and will make it easier for you to use vim in any machine.
As a beginner, you don't exactly know what you need, so go ahead and add anything that you think might improve your workflow. I usually recommend beginners to start with NERDTree and fzf. In the future, you will eventually want to trim your configs and remove the clutter.
Ultimately, the best tip I can give to anyone using vim is to adopt an incremental learning approach. Try to improve a little bit every day and avoid trying to learn too many techniques in a short period. You will use your text-editor of choice — hopefully vim — every single day, thus it is better to take a few days to assimilate a single command and use it for the rest of your life than to learn many tricks quickly and use them only once.
Dig deep, learn things properly and at a moderate pace. For that, I highly recommend vim Wikia.
Plugins I'm Currently Using
To install and manage plugins you will probably want to use vim-plug. It's minimalist, easy to install, easy to use and has many nice features such as on-demand loading of plugins and post-update hooks which allow you to configure instructions for extra installation steps.
neomake was neovim's main selling point for me. It allows you to run programs asynchronously and therefore avoid blocking the main thread. This feature is especially useful for running syntax-checks or any other CPU intensive actions that would have previously caused vim to freeze for a few seconds.
NERDTree is an easy way of visualising and managing file trees. Even though all of its features have straightforward native alternatives, they are simply not as practical. I use the following lines to open it using Ctrl+n and show hidden files:
" NERDTree on ctrl+n
let NERDTreeShowHidden=1
map <silent> <C-n> :NERDTreeToggle<CR>

" close NERDTree after a file is opened
let g:NERDTreeQuitOnOpen=1
fzf.vim does fuzzy-finding, allowing you to quickly find and open files by typing part of their names. Installing fzf is a bit more complicated than installing other plugins. Since fzf.vim is just a wrapper around fzf, you will need to use the following lines to ensure its binaries are installed.
Plug 'junegunn/fzf', { 'dir': '~/.fzf', 'do': './install --bin' }
Plug 'junegunn/fzf.vim'
fzf can use other programs to find files, such as UNIX's find or the silver searcher — also known as ag. I like using ag because I can configure it to ignore the files I have in my .gitignore and therefore have pretty sensible defaults for whichever repository I'm working with.
" make FZF respect gitignore if `ag` is installed
" you will obviously need to install `ag` for this to work
if (executable('ag'))
    let $FZF_DEFAULT_COMMAND = 'ag --hidden --ignore .git -g ""'
endif
Finally, I use the following to line to bind fzf to ctrl+p:
nnoremap <C-P> :Files<CR>
editorconfig-vim helps me quickly adapt my editor's settings to any project as long as it has a .editorconfig file. Thanks to it I don't have to worry about things like line-ending formats, and indentation size and characters.
emmet-vim makes it very quick to write HTML. If you write a lot of JSX — as I do — the following lines will make it work correctly when dealing with .jsx or .tsx files.
" make emmet behave well with JSX in JS and TS files
let g:user_emmet_settings = {
\  'javascript' : {
\      'extends' : 'jsx',
\  },
\  'typescript' : {
\      'extends' : 'tsx',
\  },
\}
I use ale as a linting engine because it works with most linters from most languages straight out-of-the-box. Using a single tool for all languages avoids all the pain I previously had configuring multiple plugins and then having to maintain all their configs. With ale, if you have eslint and an .eslintrc file in your project it will automatically run eslint with the correct settings and display the errors.
I also configured it to make linting seem faster, to remove any trailing lines and trim unnecessary whitespace.
" fix files on save
let g:ale_fix_on_save = 1

" lint after 1000ms after changes are made both on insert mode and normal mode
let g:ale_lint_on_text_changed = 'always'
let g:ale_lint_delay = 1000

" use nice symbols for errors and warnings
let g:ale_sign_error = '✗\ '
let g:ale_sign_warning = '⚠\ '

" fixer configurations
let g:ale_fixers = {
\   '*': ['remove_trailing_lines', 'trim_whitespace'],
\}
The most outstanding plugin in this list is probably YouCompleteMe, which gives me IDE-like semantic-based completion suggestions. YouCompleteMe suggestions take into account the meaning of the code (its semantics) rather than only searching for similar words (tokens).
The YouCompleteMe plugin is just a client that connects to the YouCompleteMe server, which is what actually generates the suggestions. This server works by running a different service for each language. For TypeScript, for example, YouCompleteMe runs the official TSServer made by Microsoft.
To install this plugin you also have to install the YouCompleteMe server:
" semantic-based completion
Plug 'Valloric/YouCompleteMe', { 'do': './install.py' }
If the command above is malfunctioning make sure to check if your neovim supports python-based plugins or try to run the install.py script — located at ~/.config/nvim/plugged/YouCompleteMe — manually.
Needless to say — or maybe not so needless as I'm saying it already — it will be more useful for strongly typed languages. I have tested it mostly with rust and TypeScript and it's been fantastic.
I also use the following lines to bind its suggestions to vim's default shortcut and popup for completion:
" disable auto_triggering ycm suggestions pane and instead
" use semantic completion only on Ctrl+n
let ycm_trigger_key = '<C-n>'
let g:ycm_auto_trigger = 0
let g:ycm_key_invoke_completion = ycm_trigger_key

" this is some arcane magic to allow cycling through the YCM options
" with the same key that opened it.
" See http://vim.wikia.com/wiki/Improve_completion_popup_menu for more info.
let g:ycm_key_list_select_completion = ['<TAB>', '<C-j>']
inoremap <expr> ycm_trigger_key pumvisible() ? "<C-j>" : ycm_trigger_key;
My language-specific plugins are rust.vim, vim-javascript and typescript-vim since those are the languages I've been writing more frequently. I only add other language-specific plugins when I'm about to start writing in a new language. As you might have noticed, I'm a minimalist.
tmux
tmux is a terminal multiplexer. Essentially, this is a fancy name for a program which allows you to have multiple tabs and panes in a single terminal window. It leverages the versatility of the terminal and makes it much more flexible.
If you are old enough to remember IE6 and the gruesome experience of having to browse the web using a pile of windows, you will probably remember how big of an improvement it was when browsers introduced tabs. This is the same life-changing improvement tmux provides.
In tmux lingo, every tab is a window and a window can contain one or more panes (splits). These windows are contained within sessions that you can attach or detach to your current shell. When detaching a session, the tmux server will continue running it so that you can reattach whenever you find necessary. Having sessions in the background is also useful for keeping programs running while you work on different tasks.
Having multiple panes in a single window is terrific for when you are editing text and need to keep an eye on your tests, which run whenever you change a file, for example. It is also handy for running git commands in one pane and fixing conflicts in another.
The most significant advantage of using tmux is that you can run as many programs you want in parallel and see their outputs without having to drag panels around or toggle views using a graphical interface.
Working with many different tabs is also beneficial if you quickly need to switch to a different task but don't want to discard the context in which you are currently working.
tmux's key-bindings consist of a prefix and the binding-keys themselves. To trigger a shortcut, press the prefix keys and then the bind-keys. If your prefix is, for example, Ctrl+a and your key-binding for opening a new horizontal split is -, then you will first press Ctrl+a and then press -. You can think of the prefix as the combination of keys that tell the terminal that you are going to use a tmux shortcut.
I find tmux's default key-bindings to be a bit annoying, so I did some changes.
I currently use C-a as a prefix, h, j, k, l — the same direction keys as in vim — to switch between panes, and - and | to do horizontal and vertical splits.
# Free the original `Ctrl-b` prefix keybinding.
unbind C-b

# set prefix key to ctrl-a
set -g prefix C-a

# vi keys for switching panes
bind-key h select-pane -L
bind-key j select-pane -D
bind-key k select-pane -U
bind-key l select-pane -R

# Splitting panes.
bind - split-window -v
bind | split-window -h
To resize panes, I use H, J, K, and L — all uppercase.
# shift-movement keys will resize panes
bind J resize-pane -D 5
bind K resize-pane -U 5
bind H resize-pane -L 5
bind L resize-pane -R 5
I often use prefix + z to toggle a panel's fullscreen mode so that it becomes easier to read.
In the past, I have struggled with tmux's way of copying text, so I have made some changes for it to work seamlessly.
First, I had to allow tmux to access the OSX pasteboard:
# Workaround to allow accessing OSX pasteboard
set-option -g default-command "reattach-to-user-namespace -l zsh"
Then I started using the same keys as I use in vim to select and copy text:
# Vi copypaste
setw -g mode-keys vi
unbind p
bind p paste-buffer
bind-key -T copy-mode-vi v send-keys -X begin-selection
bind-key -T copy-mode-vi y send-keys -X copy-selection-and-cancel
With these configurations, all you need to do whenever you need to scroll through your tmux panes and/or copy text is to press preffix+[ to start scrolling, h j k l (or Ctrl+u and Ctrl+d) to move the cursor, v or shift+v (for entire lines) for making a selection and y to copy the selection you made.
Here are other small self-explanatory improvements:
# Start tabs at index 1
# (they usually start at 0, which is too far from where my fingers usually are)
set -g base-index 1

# Make pane numbering consistent with windows
setw -g pane-base-index 1

# Renumber windows when a window is closed
# This guarantees it will be easier for you to switch
# between windows as you keep opening and closing them
set -g renumber-windows on

# Automatically set window title according to the running program
set-window-option -g automatic-rename on
set-option -g set-titles on
tmux plugins
To install and manage tmux plugins you will need tpm.
There is no point in replicating its installation instructions here, so I'll just link to their README.
The theme I use for tmux is my own fork of nord-tmux. I absolutely adore their colour scheme, but I wanted to customise my status-bar a bit more, hence why I have made my own fork. If you want to customise yours too, go ahead and fork their repository — or mine — and start pushing changes to it.
Once you have decided the theme you want to use, you can also add new plugins and customise your status bar.
If you want to display your battery percentage, for example, you can use tmux-battery by adding the following line to your .tmux.conf and pressing prefix + I (capital I!) to install it.
set -g @plugin 'tmux-plugins/tmux-battery'
Then just reference the plugin's items in your status_bar configuration:
set -g status-right 'Battery: #{battery_icon} #{battery_percentage} #{battery_remain} | %a %h-%d %H:%M '
You can find a complete guide on how to configure your status_bar in the tao-of-tmux book.
Here is a list of plugins I'm currently using:
lucasfcosta/nord-tmux→ my themetmux-plugins/tmux-cpu→ shows information about CPU usagetmux-plugins/tmux-battery→ shows battery statstmux-plugins/tmux-online-status→ shows the connectivity statustmux-plugins/tmux-resurrect→ persists sessions between shutdowns/restartstmux-plugins/tmux-continuum→ continuously saves and reloads sessionsrobhurring/tmux-spotify→ displays currently playing spotify songs
zsh
In UNIX, a shell does the job of providing you with a text-based interface to communicate with the underlying operating system. You can think of it as another way of telling your machine what it should do, but instead of clicking around and having all the clutter that graphical interfaces often display you type commands.
Usually, you will have bash set as your default shell (the login shell).
zsh is just another kind of shell — one which offers handy additional features.
To set up zsh as your login shell, you can use:
chsh -s $(which zsh)
zsh's auto-completion is far superior to the one in bash, both for file paths, for programs like git, and for many others. Just press TAB as you type a command and it will try to complete it for you.
zsh is highly extensible, hence why oh-my-zsh is so popular. oh-my-zsh is a framework for managing your zsh configuration that makes it effortless to add plugins, use themes and customise other relevant settings. You can find the installation instructions for oh-my-zsh on their wiki.
The configuration for zsh lives in a file called .zshrc located at your home directory (~/.zshrc). This file is executed in the current context whenever you open a new instance of the shell. Running it gives you access to any exported environment variables exported by it and lets you run any other necessary commands for setting up the shell's environment when it gets started. Executing a script in the current context is also known as "sourcing it" because the command which does this is source. Whenever you want an environment variable to be present in any new shell instance you create, add a line like this to your .zshrc.
# Use nvim as the default editor
export EDITOR=nvim
To keep my .zshrc clean I use an .aliases file. The filename is self-explanatory.
# Load aliases
if [ -f ~/.aliases ]; then
    . ~/.aliases
fi
You can see the contents of my .aliases file on GitHub.
You can also use .zshrc to handle other convenient tasks such as setting up nvm to manage your Node versions or setting up cargo to work with rust:
# Add RVM to PATH for scripting. Make sure this is the last PATH variable change.
export NVM_DIR="$HOME/.nvm"
[ -s "$NVM_DIR/nvm.sh" ] && \. "$NVM_DIR/nvm.sh"  # This loads nvm
[ -s "$NVM_DIR/bash_completion" ] && \. "$NVM_DIR/bash_completion"  # This loads nvm bash_completion

# Add cargo to the PATH
source $HOME/.cargo/env
zsh Plugins
My current zsh prompt is the spaceship-prompt. It is pretty, minimalist and includes emojis — an essential feature for millennials. Installing it is quite simple, even more so if you're using oh-my-zsh.
My favourite plugin is definitely z. It allows you to jump to a directory without typing its full path. If you were in the directory /Users/Elon/tesla/new-york, switched to /london and now want to switch back to new-york, instead of typing the full path, you can just type z new-york.
z works by learning which directories you have been accessing more frequently and then uses that information to take you to the right place.
I also use the git plugin, which is just a bunch of convenient aliases for git. My favourite aliases are g for git, gcm for git checkout master, gp for git push, gst for git status, grb for git rebase, and grba and grbc for git rebase --abort and git rebase --continue.
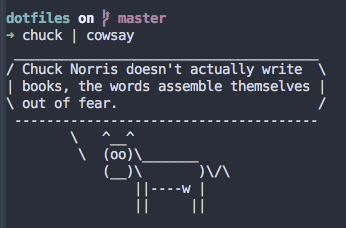
If you're in an early 2000's vibe, you can install the chucknorris plugin and use the chuck command to get jokes that used to be funny.
# .zshrc plugins section
plugins=(
  z
  git
  chucknorris # ¯\_(ツ)_/¯
)
iTerm2
iTerm2 is a terminal emulator. Not to be confused with a shell, a terminal emulator is just the window which contains the shell. The terminal emulator is responsible for how the shell is displayed.
iTerm2 is nice because it lets me setup which fonts and colours I want to use.
By pressing Ctrl+, I get to configure its appearance and other useful settings.
My iTerm2 uses the nord iTerm colours to match with the rest of my themes and renders text using a DejaVu Sans Mono for Powerline font.
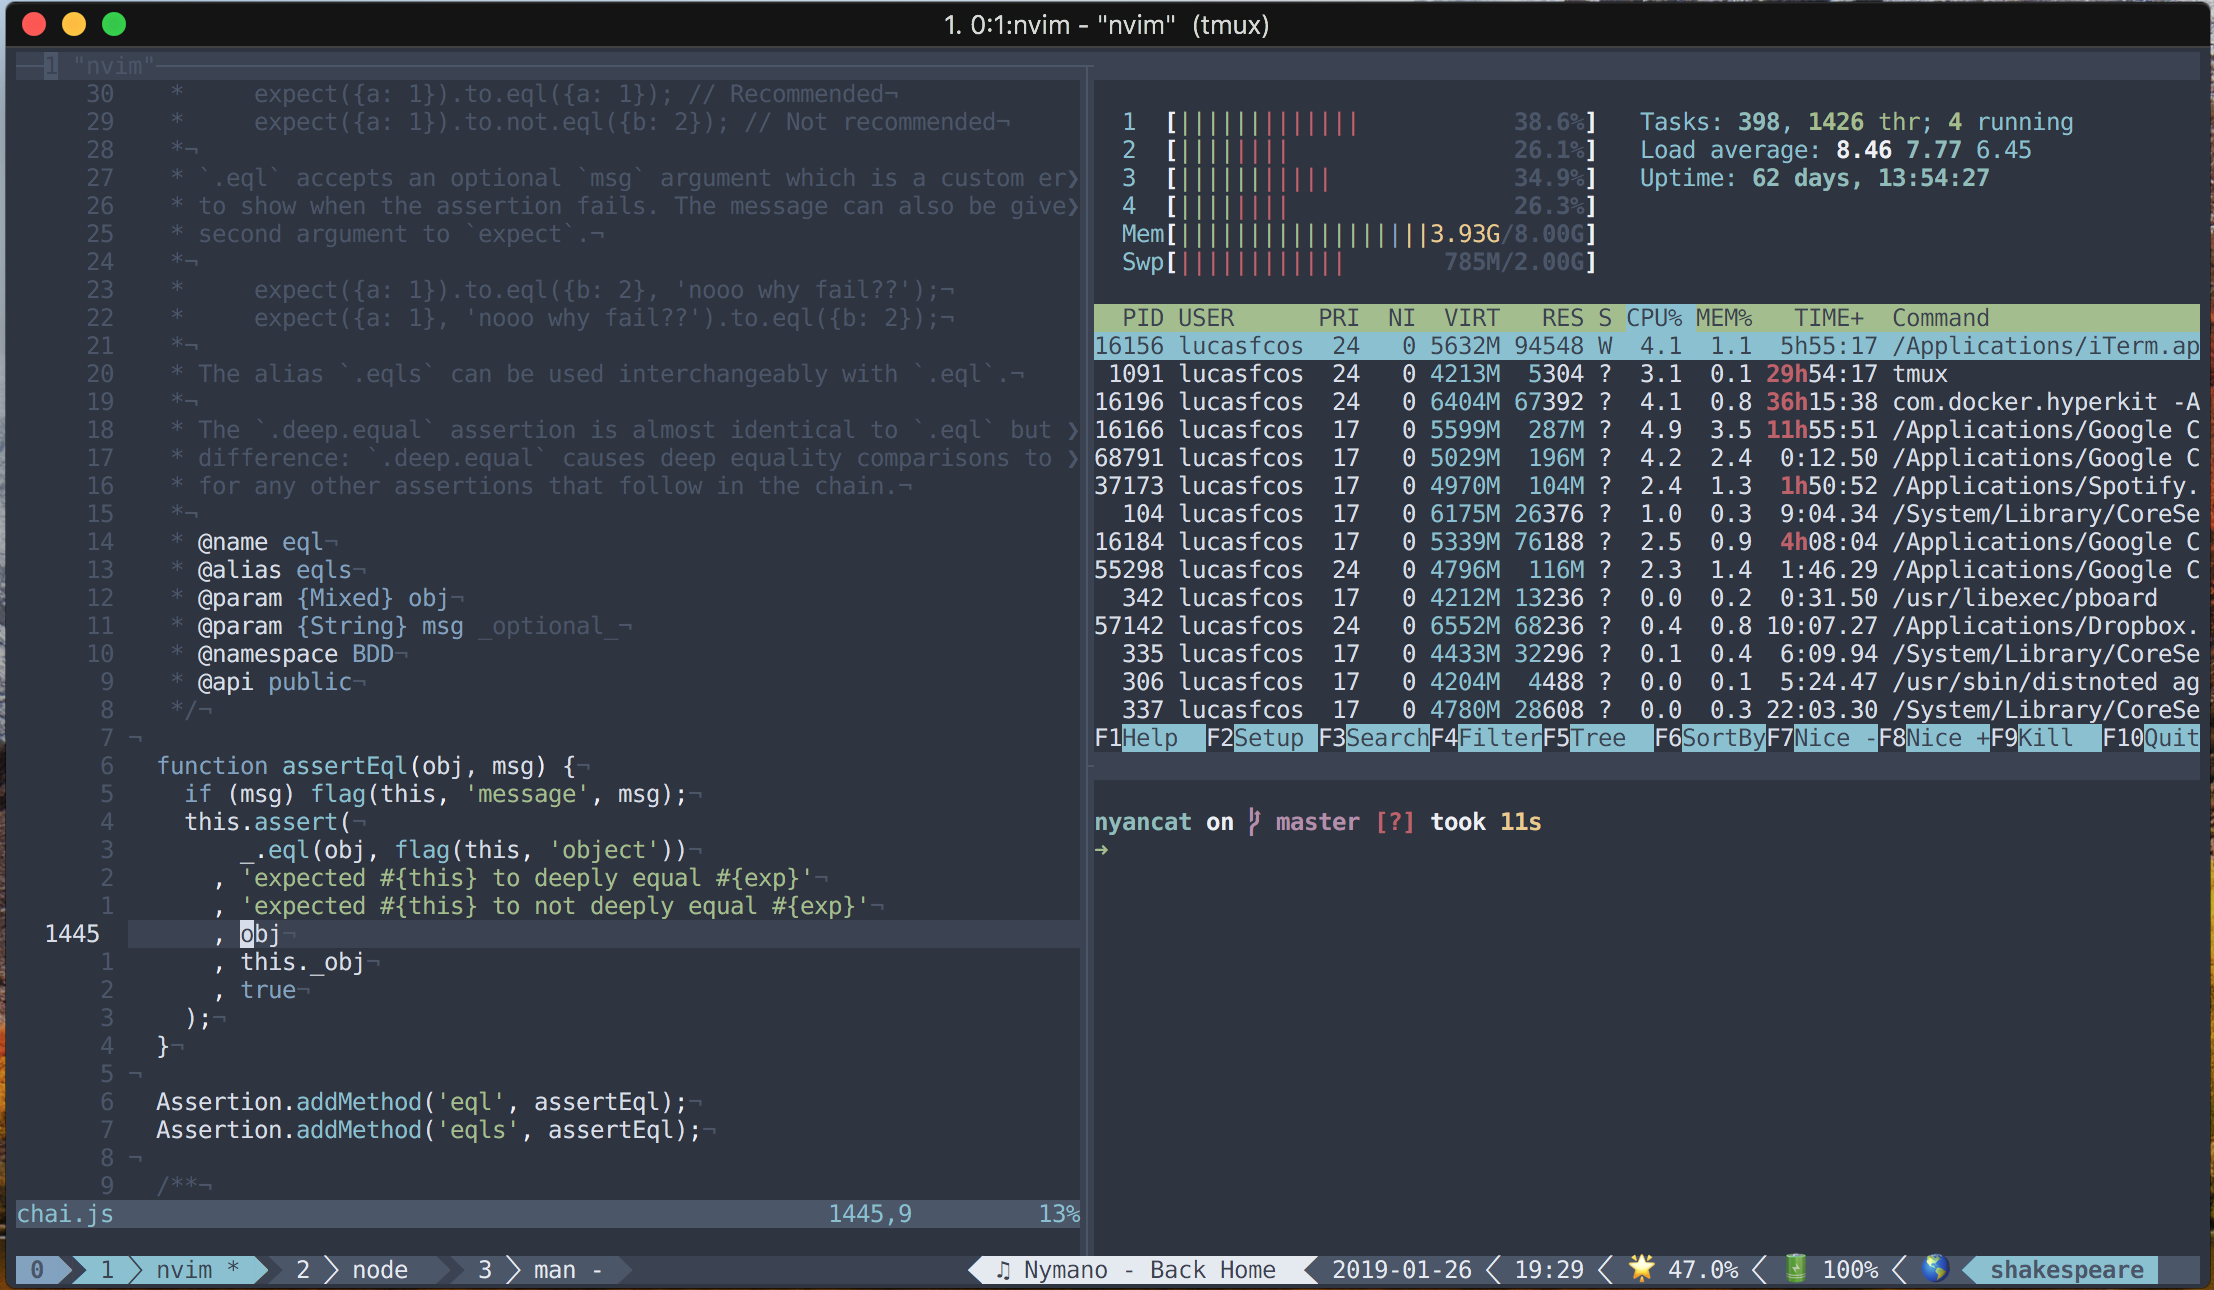
Powerline Fonts are also a neat thing to have. They include many characters used for text-based layouts such as the fill-blocks and triangles you can see in my tmux status-bar.

I use iTerm2 simply because it's more customizable than Mac OS's default terminal. I don't need its window control features and tabs since I already use tmux.
Other Useful Programs & Things to Know
The art of using the terminal as your primary interface to interact with the machine requires time and patience.
The hardest part is probably adding new tools to your workflow and getting used to them. Sometimes you don't even know there is a command-line alternative for something you want to do.
Here is a list of other useful programs to incorporate to your workflow.
curl, for transferring data with URLs. I mostly use it to do HTTP requests.jq, for working with JSON.sed, for transforming text. I adoresed.ag, for searching code.awk, for transforming and extracting data. I don't use it much, but it is particularly useful for scripting or for combining programs effectively.cron, for scheduling jobs.rsync, for transferring files.make, for automating tasks.gzip, for working with compressed files.
Being a versed terminal user also requires knowledge about basic management commands, streams, UNIX permissions and shell scripting.
Other Recommended Resources
Don't forget rule number one.
Whenever in doubt, read the manual.
Subscribe
Get an email when I publish a new post. I'll never send you spam.
